
Σάββατο 31 Δεκεμβρίου 2011
Σάββατο 26 Νοεμβρίου 2011
RGV250 CARBS
| RGV250 CARBS | ||||||||||||||||
| E-00 Japan (domestic home market) | ||||||||||||||||
| E-01 General (general export) | ||||||||||||||||
| E-02 England (UK) | ||||||||||||||||
| E-04 France | ||||||||||||||||
| E-21 Belgium | ||||||||||||||||
| E-22 Germany (former West-Germany) | ||||||||||||||||
| E-24 Australia | ||||||||||||||||
| E-34 Italy | ||||||||||||||||
| BIKE | JDM SP FL/FNL | JDM SP FM/FNM | JDM SP FN/FNN | JDM SP FP | JDM L | JDM M | JDM P | JDM R | ||||||||
| MARKET | E-00 | E-00 | E-00 | E-00 | E-00 | E-00 | E-00 | E-00 | ||||||||
| TYPE | TM34SS | TM34SS | TM34SS | TM32SS | VM32SS | TM30SS | TM30 | TM30 | ||||||||
| SIZE | 34mm | 34mm | 34mm | 32mm | 32mm | 32×28mm | 32×28mm | 32×28mm | ||||||||
| MODEL | 22D1 | 22D6 | 22D6 | - | 22D0 | 22D5 | 23D2 | 23D2 | ||||||||
| The main jet(M.J.) | L:#270 | R:#280 | L:#270 | R:#280 | L:#270 | R:#280 | L:#250 | R:#240 | L:#250 | R:#270 | L:#260 | R:#260 | L:260 | R:250 | L:260 | R:250 |
| main air jet(M.A.J) | 0,6 | 0,6 | 0,6 | 0,6 | 0,6 | 0,7 | 0,6 | 0,6 | ||||||||
| Jet needle(J.N) | 6FL85-55-3 | 6FLD86-56-3 | 6GH9-55 | 6GH9-55 | 6GH9-55 | 6GH9-55 | 6FL-85-55 | 6FL-85-55 | 6FL85-55-3 | 6FLD86-56-3 | 6GH8-55 | 6GH9-55 | 6GH13-55 | 6GH13-55 | 6GH13-55 | 6GH13-55 |
| Needle jet(N.J.) | O-8 | P-0 | P-0 | P-0 | O-9 | O-9 | L:P-5 | R:P-4 | P-5 | P-4 | ||||||
| Pilot jet(P.J.) | 27,5 | 27,5 | 27,5 | 27,5 | 27,5 | 27,5 | 20 | 20 | ||||||||
| Pilot air jet(P.A.J) | 1,3 | 1,1 | 1,3 | 1,3 | 1,3 | 1,3 | 1 | 1 | ||||||||
| Power jet 1(PWJ1) | L:60 | R:50 | L:40 | R:35 | L:40 | R:35 | L:50 | R:57.5 | L:60 | R:50 | - | - | - | - | - | - |
| Power jet 2(PWJ2) | 0,7 | 0,6 | 0,6 | 0,7 | 0,7 | - | - | - | ||||||||
| BIKE | EXPORT K | EXPORT L | EXPORT M | EXPORT M | EXPORT M | EXPORT P | EXPORT P | RS250 | ||||||||
| MARKET | E-01 | E-02,04,21,24,34 | E-02,04,21,24,34 | E-22 | E-01 | E-02,04,21,24,34 | E-22 | |||||||||
| TYPE | VM32SS | VM34SS | TM34SS | TM34SS | TM34SS | TM34SS | TM34SS | TM34SS | ||||||||
| SIZE | 32mm | 34mm | 34mm | 34mm | 34mm | 34MM | 34MM | 34mm | ||||||||
| MODEL | 12C00 | 12C30 | 22D2 | 22D3 | 22D4 | 22D2 | 22D7 | 23D4 | ||||||||
| The main jet(M.J.) | L:#200 | L:#200 | L:#270 | L:#270 | L:#250 | R:#270 | L:#270 | R:#280 | L:#270 | R:#270 | L:#270 | R:#280 | L:#260 | R:#250 | L:#270 | R:#280 |
| main air jet(M.A.J) | 0,6 | 0,6 | 0,6 | 0,6 | 0,7 | 0,6 | 0,6 | 1,5 | ||||||||
| Jet needle(J.N) | 6FL65-54-4 | 6FL65-54-4 | 6CIF02-56-3 | 6CKFO2-56-3 | 6FL85-55-3 | 6FLD86-56-3 | 6GH8-55-3 | 6GH8-55-3 | 6FL85-55-3 | 6FLD86-56-2 | 6GH8-55-3 | 6GH8-55-3 | 6FL89-55-3 | 6FL89-55-3 | 6GH8-55-3 | 6GH8-55-3 |
| Needle jet(N.J.) | 0-6 | 0-6 | P-0 | 0-8 | 0-9 | 0-9 | 0-9 | 0-7 | O-8 | |||||||
| Pilot jet(P.J.) | 25 | 27,5 | 27,5 | 20 | 27,5 | 27,5 | 22,5 | 27,5 | ||||||||
| Pilot air jet(P.A.J) | AIR SCREW 2 TURNS | AIR SCREW 1.75 TURN | 0,6 | 0,6 | 0,6 | 0,6 | AIR SCREW 1.25 TURN | 0,6 | ||||||||
| Power jet 1(PWJ1) | L:100 | R:100 | L:75 | R:65 | L:55 | R:35 | 55 | L:55 | R:45 | 55 | L:45 | R:35 | L:55 | R:35 | ||
| Power jet 2(PWJ2) | 1 | L:0.8 | R:0.7 | 0,7 | 0,7 | 0,7 | 0,7 | 0,7 | 0,7 | |||||||
Τετάρτη 14 Σεπτεμβρίου 2011

Δευτέρα 5 Σεπτεμβρίου 2011
Two Stroke Piston Diagnosis
The process of examining a used piston can tell a mechanic helpful information on the condition of an engine. When an engine failure occurs, the piston is likely to take the brunt of the damage. A careful examination of the piston can help a mechanic trace the source of a mechanical or tuning problem. This technical article serves as a guide for the most common mechanical problems that plague engines. | |
| | |
| PERFECT BROWN CROWN The crown of this piston shows an ideal carbon pattern. The transfer ports of this two-stroke engine are flowing equally and the colour of the carbon pattern is chocolate brown. That indicates that this engine's carb is jetted correctly. |  |
| | |
| BLACK SPOT HOT The underside of this piston has a black spot. The black spot is a carbon deposit that resulted from pre-mix oil burning on to the piston because the piston's crown was too hot. The main reasons for this problem are overheating due to too lean carb jetting or coolant system failure. |  |
| | |
| ASH TRASH This piston crown has an ash color, which shows that the engine has run hot. The ash color is actually piston material that has started to flash (melt) and turned to tiny flakes. If this engine was run any longer, it probably would,ve developed a hot spot and hole near the exhaust side and failed. The main causes of this problem are too lean carb jetting, too hot spark plug range, too far advanced ignition timing, too much compression for the fuel's octane, or a general overheating problem. |  |
| | |
| SMASHED DEBRIS This piston crown has been damaged because debris entered the combustion chamber and was crushed between the piston and the cylinder head. This engine had a corresponding damage pattern on the head's squish band. The common causes of this problem are broken needle bearings from the small or big end bearings of the connecting rod, broken ring ends, or a dislodged ring centering pin. When A problem like this occurs, its important to locate where the debris originated. Also the crankcases must be flushed out to remove any left over debris that could cause the same damage again. If the debris originated from the big end of the connecting rod, then the crankshaft should be replaced along with the main bearings and seals. |  |
| | |
| CHIPPED CROWN DROWNED This piston crown chipped at the top ring groove because of a head gasket leak. The coolant is drawn into the combustion chamber on the down-stroke of the piston. When the coolant hits the piston crown it makes the aluminium brittle and it eventually cracks. In extreme cases the head gasket leak can cause erosion at the top edge of the cylinder and the corresponding area of the head. Minor leaks of the gasket or o-ring appear as black spots across the gasket surface. An engine that suffers from coolant being pressurized and forced out of the radiator cap's vent tube, is a strong indication of a head gasket leak. In most cases the top of the cylinder and the face of the cylinder head must be resurfaced when a leak occurs. Most mx bikes have head stays mounting the head to the frame. Over time the head can become warped near the head stay mounting tab, because of the forces transferred through the frame from the top shock mount. It's important to check for warpage of the head every time you rebuild the top end. |  |
| | |
| SHATTERED SKIRT The skirts of this piston shattered because the piston to cylinder clearance was too great. When the piston is allowed to rattle in the cylinder bore, it develops stress cracks and eventually shatters. |  |
| | |
| SNAPPED ROD The connecting rod of this engine snapped in half because the clearance between the rod and the thrust washers of the big end was too great. When the big end bearing wears out, the radial deflection of the rod becomes excessive and the rod suffers from torsion vibration. This leads to connecting rod breakage and catastrophic engine damage. The big end clearance should be checked every time you rebuild the top end. To check the side clearance of the connecting rod, insert a feeler gauge between the rod and a thrust washer. Check the maximum wear limits in your engine's factory service manual. |  |
| | |
| FOUR-CORNER SEIZURE This piston has vertical seizure marks at four equally spaced points around the circumference. A four-corner seizure is caused when the piston expands faster than the cylinder and the clearance between the piston and cylinder is reduced. Another common problem of this type is a single point seizure on the center of the exhaust side of the piston. However this occurs only on cylinders with bridged exhaust ports. The main causes for this problem are too quick warm-up, too lean carb jetting (main jet), or too hot of a spark plug range. |  |
| | |
| MULTI-POINT SEIZURE This piston has many vertical seizure marks around the circumference. This cylinder was bored to a diameter that was too small for the piston. As soon as the engine started and the piston started its thermal expansion, the piston pressed up against the cylinder walls and seized. The optimum piston to cylinder wall clearances for different types of cylinders vary greatly. For example a 50cc composite plated cylinder can use a piston to cylinder wall clearance of .0015 inches, whereas a 1200cc steel-sleeved cylinder snowmobile set-up for grass drags will need between .0055 to .0075 inches. For the best recommendation on the optimum piston to cylinder clearance for your engine, look to the specs that come packaged with the piston or consult your factory service manual. |  |
| | |
| INTAKE SIDE SEIZURE This piston was seized on the intake side. This is very uncommon and is caused by only one thing, loss of lubrication. There are three possible causes for loss of lubrication, no pre-mix oil, separation of the fuel and pre-mix oil in the fuel tank, water passed through the air-filter and washed the oil film off the piston skirt. |  |
| | |
| COMPOSITE FLAKING Most two-stroke cylinders used on motorcycles and snowmobiles, have composite plated cylinders. The composite material is made of tiny silicon carbide particles. The electro-plating process enables the silicon carbide particles to bond to the cylinder wall. The particles are very hard and sharp, they don't bond to the ports so the manufacturer or reconditioning specialist must thoroughly clean the cylinder. Sometimes the silicon carbide "flashing" breaks loose from the ports and becomes wedged between the cylinder and the piston. This causes tiny vertical scratches in the piston. This problem isn't necessarily dangerous and doesn't cause catastrophic piston failure, but it should be addressed by thoroughly flushing the cylinder and ball-honing the bore to redefine the cross-hatching marks. Normally you will need to replace the piston kit because the scratches will reduce the piston's diameter beyond the wear spec. |  |
| | |
| BURNT-OUT BLOW-HOLE This piston was overheated so badly that a hole melted through the crown and collapsed the ring grooves on the exhaust side. Normally the piston temperature is higher on the exhaust side so catastrophic problems will appear there first. There are several reasons for a failure like this, here are the most common; air-leak at the magneto side crankshaft seal, too lean carb jetting, too far advanced ignition timing or faulty igniter box, too hot of a spark plug range, too high of a compression ratio, too low octane fuel. |  |
| | |
| BLOW-BY This piston didn't fail in operation but it does show the most common problem, blow-by. The rings were worn past the maximum ring end gap spec, allowing combustion pressure to seep past the rings and down the piston skirt causing a distinct carbon pattern. Its possible that the cylinder walls cross-hatched honing pattern is partly to blame. If the cylinder walls are glazed or worn too far, even new rings won't seal properly to prevent a blow-by problem. Flex-Hones is a product available at most auto parts stores. They can be used to remove oil glazing and restore cross-hatch honing marks that enable the rings to wear to the cylinder and form a good seal. If you purchase a Flex-Hone for your cylinder, the proper grit is 240 and the size should be 10% smaller than the bore diameter. |  |
| 11 TIPS FOR REBUILDING A TWO-STROKE TOP END
| |
Σάββατο 3 Σεπτεμβρίου 2011
Νέος "τιμοκατάλογος" παραβάσεων...
Σε ισχύ από σήμερα
Βαθιά το χέρι στη τσέπη θα πρέπει να βάλουν όσοι παραβιάσουν το νέο κώδικα οδικής κυκλοφορίας που τίθεται σε εφαρμογή από σήμερα.Η παραβίαση του κόκκινου σηματοδότη θα τιμωρείται πλέον με 1050 ευρώ αντί για 700 που είναι σήμερα, ενώ η παραβίαση του STOP θα στοιχίζει 900 ευρώ.
Το πρόστιμο για στάθμευση σε ράμπα από 150 ευρώ θα ανέλθει στα 325, ενώ για στάθμευση σε πεζοδρόμιο, οι παραβάτες θα πληρώνουν 120 ευρώ, έναντι των 80 ευρώ που πληρώνουν σήμερα.
Ανάλογες αυξήσεις προβλέπονται για την παρεμπόδιση κυκλοφορίας του τραμ, καθώς από 150 ευρώ το πρόστιμο εκτινάσσεται σε 225.
Αυστηρά όμως θα είναι τα πρόστιμα και για τις κόντρες αυτοκινήτων και μοτοσικλετών. Έτσι, στους παραβάτες θα επιβάλλεται πρόστιμο 1.050 ευρώ, από 700 που ισχύει σήμερα.
Ο νέος ΚΟΚ όμως, εκτός από αυξήσεις, προβλέπει και μείωση ποινών για παραβάσεις όπως είναι το κράνος, οι ζώνες ασφαλείας και η μη προσκόμιση ελέγχου από το ΚΤΕΟ. Ετσι, το πρόστιμο για μη χρήση κράνους ή ζώνης ασφαλείας από 700 ευρώ μειώνεται σε 490.
Τρίτη 30 Αυγούστου 2011
σταντ
κλέβοντας την ιδέα από το internet,ξεκίνησα να φτιάξω ένα σταντ,που να πιάνει την μηχανή στην μέση στον σκελετό,...και να την σηκώνει ολόκληρη στον αέρα,......το έκανα και λίγο ψιλό,οποτε δεν χρειαζόμαστε ούτε ράμπα για διαφορες δουλίτσες που κάνουμε.
ακολουθούν φωτο από όλη την κατασκευή.
και ξεκινάμε,....θέλουμε μια λαμα 10 χιλιοστών πάχος,...και 10x10cm διαστάσεων

πάνω σε αυτήν την λαμα,θα βιδώσουμε το κουζινέτο,το οποιο θα δουλεύει μέσα στον κανόνα(όπως θα δούμε στην συνεχεια)
εδώ να πω,χρησιμοποίησα κουζινέτο και κανόνα,επειδή τα είχα....με δυο μεταλλικά στράντζα,η και σωλήνες(το ένα μέσα στο άλλο)θα μπορούσαμε να έχουμε ένα πολύ καλο αποτέλεσμα χωρίς να μας ανεβάζει το κόστος...
 τώρα θέλουμε δυο άξονες,έναν φ28 και εναν φ12 έχουν μήκος ο φ28 15 cm,και ο φ12 25cm,τους τοποθετούμε στην δυο τρύπες που έχουμε από τον άξονα ψαλιδιού,και από τον σκελετό και....
 ξετρυπαμε την μεταλλική πλακα μας,στην μια γορία με τρυπάνι φ12,περνάμε τον μικρό άξονα μας,τοποθετούμε στην μηχανή μας ξανά ώστε να γωνιάσουμε την πλακα μας με την μηχανή μας,και να σημαδέψουμε για τον δεύτερο άξονα.
εδώ να πω ότι θα μπορούσαμε να κολλήσουμε τους άξονες πάνω στην πλακα,αλλα κυρίως για ψυχολογικούς λόγους ασφαλειας,προτίμησα να την τρυπήσω κιόλας.
 αφού λοιπόν σημαδέψαμε,και τρυπήσαμε σωστά,....κολλάμε τους άξονες στην πλακα
 πάνω στην πλακα τώρα θα βιδώσουμε το κουζινέτο ,βάζουμε και τον κανόνα,....και τελειώσαμε από αυτό το κομμάτι της κατασκευής
 την βάση κάτω,την έκανα με στραντζο 40x25,και το κάθε πόδι έχει μήκος 65 εκατοστά,όπως θα δείτε έκανα και ένα σπάσιμο για να χαμηλώσει,με μικρότερες ροδες δεν νομίζω να υπάρχει πρόβλημα,....και φυσικά όλα αυτά για να μπορεί να περνάει κάτω από την μηχανή χωρίς να βρίσκει κάπου...


 σειρά έχει η τοποθέτηση του κανόνα στην βάση,εγώ έβαλα μια λάμα 10 χιλιοστά πάχος και 5 εκατοστά φάρδος,την τοποθέτησα κάθετα στην βάση,και βίδωσα τον κανόνα.
στην πάνω πλευρά έβαλα ένα γρανάζι,οπού με έναν λεβιε το περιστρέφω και κάνω την ανύψωση.είναι παρά πολύ σταθερό(θα ανεβάσω video να δείτε)αλλά για λύσιμο του άξονα τροχού,λασκαρω κάτω,και μετά σήκωμα,....επίσης θα δείτε κάτω από το κουζινέτο περνάω έναν πυρο 10 χιλιοστόν για ασφάλεια και στοπ,...κάνοντας 2-3 τρύπες έχουμε και 2-3 διαφορετικά σημεία ανύψωσης.


.
ακολουθούν φωτο από όλη την κατασκευή.
και ξεκινάμε,....θέλουμε μια λαμα 10 χιλιοστών πάχος,...και 10x10cm διαστάσεων
πάνω σε αυτήν την λαμα,θα βιδώσουμε το κουζινέτο,το οποιο θα δουλεύει μέσα στον κανόνα(όπως θα δούμε στην συνεχεια)
εδώ να πω,χρησιμοποίησα κουζινέτο και κανόνα,επειδή τα είχα....με δυο μεταλλικά στράντζα,η και σωλήνες(το ένα μέσα στο άλλο)θα μπορούσαμε να έχουμε ένα πολύ καλο αποτέλεσμα χωρίς να μας ανεβάζει το κόστος...
ξετρυπαμε την μεταλλική πλακα μας,στην μια γορία με τρυπάνι φ12,περνάμε τον μικρό άξονα μας,τοποθετούμε στην μηχανή μας ξανά ώστε να γωνιάσουμε την πλακα μας με την μηχανή μας,και να σημαδέψουμε για τον δεύτερο άξονα.εδώ να πω ότι θα μπορούσαμε να κολλήσουμε τους άξονες πάνω στην πλακα,αλλα κυρίως για ψυχολογικούς λόγους ασφαλειας,προτίμησα να την τρυπήσω κιόλας.
αφού λοιπόν σημαδέψαμε,και τρυπήσαμε σωστά,....κολλάμε τους άξονες στην πλακαπάνω στην πλακα τώρα θα βιδώσουμε το κουζινέτο ,βάζουμε και τον κανόνα,....και τελειώσαμε από αυτό το κομμάτι της κατασκευήςτην βάση κάτω,την έκανα με στραντζο 40x25,και το κάθε πόδι έχει μήκος 65 εκατοστά,όπως θα δείτε έκανα και ένα σπάσιμο για να χαμηλώσει,με μικρότερες ροδες δεν νομίζω να υπάρχει πρόβλημα,....και φυσικά όλα αυτά για να μπορεί να περνάει κάτω από την μηχανή χωρίς να βρίσκει κάπου...σειρά έχει η τοποθέτηση του κανόνα στην βάση,εγώ έβαλα μια λάμα 10 χιλιοστά πάχος και 5 εκατοστά φάρδος,την τοποθέτησα κάθετα στην βάση,και βίδωσα τον κανόνα.στην πάνω πλευρά έβαλα ένα γρανάζι,οπού με έναν λεβιε το περιστρέφω και κάνω την ανύψωση.είναι παρά πολύ σταθερό(θα ανεβάσω video να δείτε)αλλά για λύσιμο του άξονα τροχού,λασκαρω κάτω,και μετά σήκωμα,....επίσης θα δείτε κάτω από το κουζινέτο περνάω έναν πυρο 10 χιλιοστόν για ασφάλεια και στοπ,...κάνοντας 2-3 τρύπες έχουμε και 2-3 διαφορετικά σημεία ανύψωσης.
.
Παρασκευή 26 Αυγούστου 2011


Πέμπτη 25 Αυγούστου 2011
RGV 600 2 stroke 2009
ένα σχέδιο από ιδιώτη που δυστυχώς δεν κυκλοφόρησε ποτε στους δρόμους,....η honda,και γενικότερα η βιομηχανία μοτοσικλέτας είχαν αλλα πλανα.....

Τετάρτη 24 Αυγούστου 2011
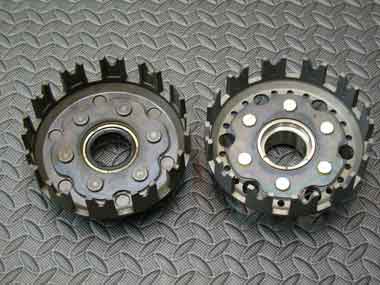
ξηρή καμπάνα f3 και sp,υγρή και οι διαφορες τους


f3---sp


Description BikeBandit.com Part Number Qty. Unit Price
1: DISCONTINUED 296716-001 $999.99
2: DISCONTINUED 296720-001 $999.99
3: CLUTCH HOUSING ASS 296723-001 $523.60
4: DISCONTINUED 296726-001 $999.99
5: DISCONTINUED 24191-001 $999.99
6: DISCONTINUED 44181-001 $999.99
7: PLATE,FRICTION 41376-001 $13.74
8: SPRING,COMPRESSION(U49) 354377-001 $3.40
9: SCREW,WITH WASHER(5HN8) 1197-001 $2.06
10: PLATE,THRUST 1 296718-001 $39.52
11: BEARING,CYL.#10 360212-001 $33.26
12: SPACER 1 296719-001 $27.41
13: WASHER,THRUST 296717-001 $19.13
14: WASHER,LOCK 348371-001 $1.47
15: NUT,HEXAGON(5NX1) 4637-001 $3.17
17: O-RING((PTT)) 358982-001 $2.68
18: SCREW,ADJUSTING 296724-001 $19.35
19: O-RING 358946-001 $2.38
20: WASHER((MH)) 358161-001 $0.43
21: NUT(USA) 363329-001 $1.39
22: BALL 15/32(U49) 361010-001 $0.91
23: O-RING(5NX1) 359130-001 $4.20
24: DISCONTINUED 296725-001 $999.99
26: O-RING(U49) 359037-001 $1.11
27: PLATE,SEAT 296727-001 $26.18
28: OIL SEAL,S-TYPE 358313-001 $15.26
29: BOLT, HEXAGON(ISO) 364429-001 $0.66
30: WASHER,SPRING(U49) 358132-001 $0.43
31: O-RING 359281-001 $5.54
32: BOLT (59W)(59W) 344770-001 $5.97
33: NUT,SPEC'L SHAPE(PN283) [NUT,SPEC'L SHAPE] 345956-001 $1.37
34: SPRING,COMPRESSION(USA) 354136-001 $1.18
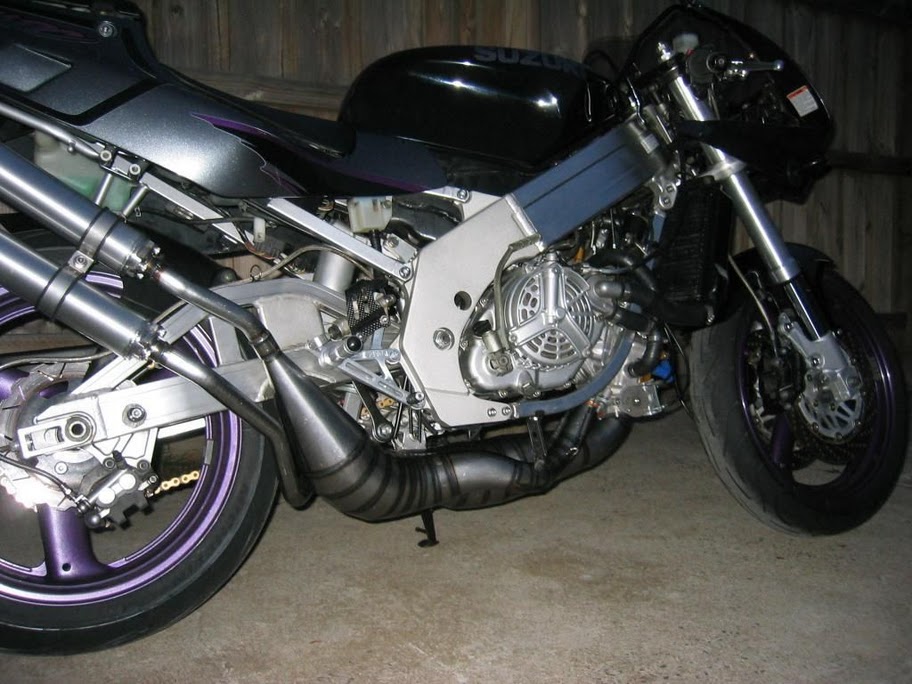
ακολουθούν φότο από την κλασική υγρή καμπάνα τον rgv
ποια είναι η διαφορα στην πραγματικότητα?
η καμπάνα είναι ένα πολύ βαρύ εξάρτημα του κινητήρα μας,το οποιο παίρνει την κίνηση από τον στρόφαλο μας και την μεταφέρει στο σασμάν-τροχό....αυτό σημαίνει ότι το βάρος του είναι ένα πολύ σημαντικό στοιχειο(λόγο περιστροφής κυρίως)και αρκετή δύναμη του στροφάλου μας πάει χαμένη,....έτσι λοιπόν οι βασικές διαφορες υγρής-ξερής dry-wet είναι
1.μεγάλη διαφορα στο στροφαριζμα του κινητήρα,λόγο μη αντιστασης λαδιων από το σασμάν,καθώς και μεγάλης διαφοράς βάρους
2.πολύ καλύτερες αλλαγές σχέσεων(η διαφορα θα φαινόταν καθαρά σε χρήση πίστας)
3.ακριβές στοιχεια για την διαφορα ιπποδύναμης και ροπής δεν βρήκα ακόμα,....αλλα φημολογείται ότι η sp έδινε 6-7 άλογα+ και η f3 10+
4.οι διαφορες της sp από της f3 είναι ότι η f3 είναι σχεδόν όλη μαγνησίου,και γενικότερα η f3 είναι πολύ ελαφρύτερη....
Εγγραφή σε:
Σχόλια (Atom)